Fun with Fiberglass
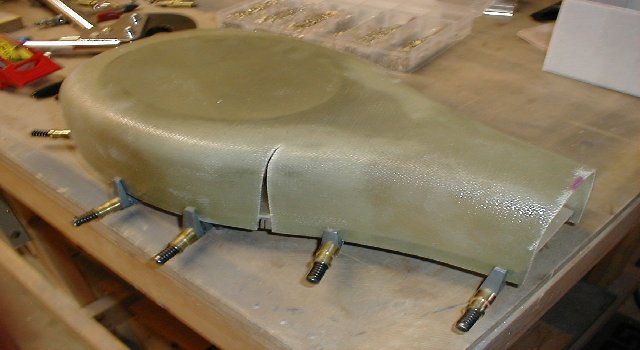
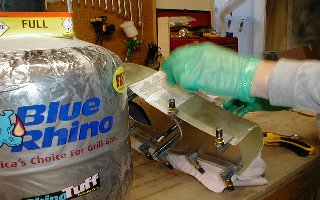
I hate working with fiberglass! This is one of the big reasons that I decided on a metal airplane. The RV however has a fair amount of glass work to be done so like it or not you have to become proficient at it if you want to end up with a plane you can be proud of. I have a friend ( Rick Smith RV-6 owner ) who is building a Long EZ composite plane that gave me the benefit of his experience. Below are the details of his one night tutorial as I attempt to make a small modification to the FAB airbox.
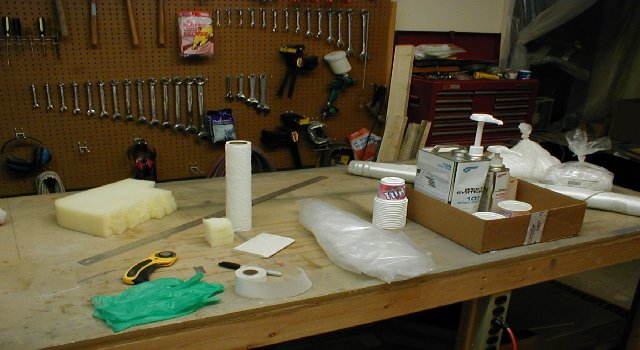
Get the right materials and tools!
You have to face the facts. This is like every other part of your RV project. Without the right tools for the job your pretty much out of luck. If you don't believe me just take a look in your tool drawer lately. If your anything like me you have accumulated quite a collection by now. All good stuff that really makes a difference in the finished product. Sooooooo...
Time to crack open the Aircraft Spruce catalog and place your order. What follows is a list of materials that I have had recommended from other builders as well as RV List members. I tried using materials that I picked up at the local Home Depot for resin and cloth ( old habits are hard to break ) but they just were not ready for prime time. The results were not even close to the finished product I ended up with by using the materials below. You can use whatever you like but this is what worked best for me.
Resin : West Systems Epoxy
This is the good stuff. A gallon will do your entire
plane unless you're a perfectionist ( like me ) and you need more.
Be sure and order the ez pump options. These little pumps screw right
on to the cans of resin and catalyst and give you the right ratio every
time. Just one pump of each and you're off and running.
(01-08400) WEST SYSTEM EPOXY KIT B-2 SLOW
This kit contains...
One gallon of the resin - (105-1G)
One quart of the catalyst - (206-QT)
Also order the pumps.
(301-B/C) WEST SYSTEM PUMP
It's also a good idea to pick up some cotton fiber and glass bubbles. This is good for build-up in areas where you either need a structural filler ( cotton fiber ) or just a cosmetic filler ( glass bubbles ). It is mixed into the resin at whatever consistency you like. It works like magic to repair boo boos ( ask me how I know :-)
(01-14600) GLASS BUBBLES 1LB
(01-14800) FLOCKED COTTON FIBER 1 LB.
The cloth I used is an 8.8 Oz. Rutan Bi-directional cloth ( this is the stuff the expert composite builders use ). I have been able to use this for my entire RV project. It's particularly useful for the windscreen fairing since it conforms really well to compound curves. This also worked well for cowling repairs and lay-ups. Keep in mind that there are hundreds of types of glass that you can use. Everything from kevlar to carbon fiber so you have lots of choices. I just decided on a good all purpose cloth that would work well for my given application. I purchased five yards and it was more than enough.
(RA7725) BID FIBERGLASS 38"
You will also need a rotary cutter. Below is the part number for the Aircraft Spruce cutter but I purchased mine from Cleaveland Tools ( FISKARS ROTARY CUTTER ) for $12 ( I need to save wherever I can ).
(RTY-2) ROTARY CUTTER
Good idea to get some peal-ply. This stuff is pure magic. It will wick all the unneeded resin away from your work. Less sanding work for you. Extra resin means extra weight.
(09-15100) SURFACE TAPE DACRON 2" SMOOTH
A plastic squeegee. This can be something as simple as what you use to apply bondo with ( I have several that I picked up at an auto parts store ) or something as cool as the rubber squeegee I purchased from Wicks Aircraft supply ( Wicks ) part number 14-4546SP.
Also pick up some single edge razor blades and a 2 mil plastic drop cloth that you can pick up at any hardware store. Some mixing cups ( I used leftover lemon chill cups ) and some popsicle sticks for mixing ( I purchased a box of tongue depressors from Wicks Aircraft that work great ). Also you will need some foam rubber ( the stuff that cushions are stuffed with ) that you can pick up at a hobby store. This is used to apply the resin with. A yard stick and some rubber gloves.
Size your job.
Try and decide how much cloth you are going to need going
in. This will cut down on the amount of resin that you will have
to waste trying to saturate cloth that will eventually just end up in the
dumpster.
This repair job was small so I decided I needed 1.5 inch by 4 inch strips. Just use your rotary cutter to cut some over sized strips of glass for working stock. I usually give myself a half an inch extra in all directions.
It's important that you have everything you need when you start, so...
Lay out your tools.
Cut 2 two inch squares of foam from your hunk of foam
rubber.
Get out your circle cuter.
A larger marker ( black Sharpie works well ).
A yard stick.
Slice off a piece of your clear plastic drop cloth (
the circle cutter is great for this ) that is at least 2.5 times the size
of the cloth you sized in STEP 2.
Your rubber gloves.
Your fiber glass cloth.
Your peal-ply.
A roll of paper towels.
One of your single edge razor blades.
Your plastic squeegee.
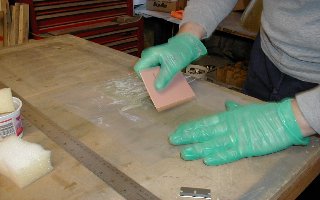
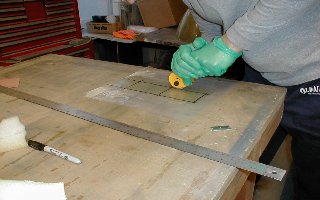
Spread out your piece of cut plastic drop cloth on a table or piece of plywood that you can cut against. This needs to be a table or surface that you don't mind getting resin on.
Place your fiberglass cloth on one half of the drop cloth so that you can easily fold the other half of the drop cloth over on top of your work.
Put on your rubber gloves.
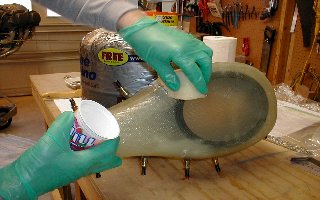
Mix up a batch of resin in your mixing cup. This process involves one or two pumps of your resin pump and an equal number of pumps of the catalyst depending on the size of your job. You should mix the resin with your mixing stick for two minutes making sure to scrape the sides of your mixing container to get all the resin in solution.
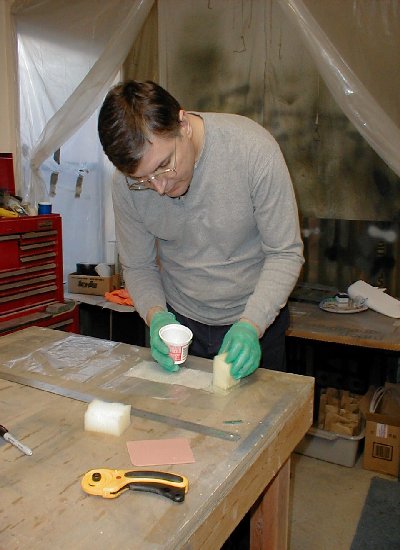
Use one of your two inch foam rubber sponges to dip in the resin and dab this on the cloth until it's completely saturated with the resin. The fiberglass cloth should actually start turning clear when it's saturated with resin.

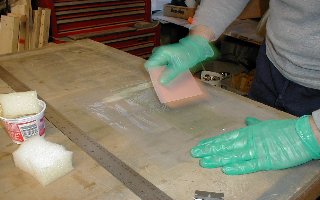
Fold the other half of the plastic drop cloth over on top of your resin saturated cloth to form an envelope with the fiberglass trapped inside.
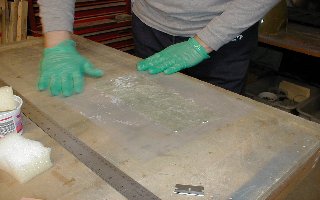
Now use your squeegee to work the resin around until all of the fiberglass cloth is completely clear and saturated with resin.
Next use the squeegee to work all the extra resin away from the cloth so that only the minimum amount of resin is in the cloth. Just work it off to the side until it's sitting in a blob in the drop cloth away from the fiberglass cloth.
Now get out your yard stick and your sharpie and make a reference line ( on the plastic drop cloth ) across the top of your saturated fiberglass cloth.
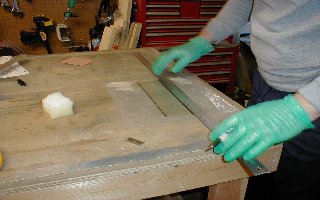
Now use this reference line to mark out the strips of fiberglass cloth that you want to apply to your work.
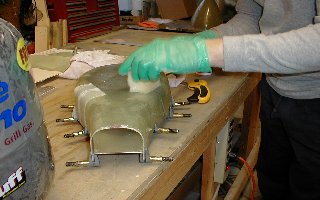
If you have enough resin left use your saturated foam rubber to dab some of the resin on the area where you want to apply the cloth. In my case this was the side of the air box. Sometimes it takes so much resin to saturate the fiberglass cloth that you need to mix some more at this point. If you have to then go ahead. You have time.
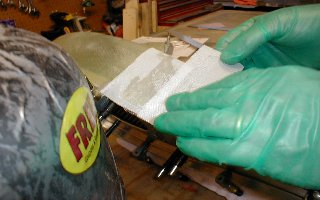
Now use your circle cutter to slice along the lines that you have drawn on your plastic drop cloth.
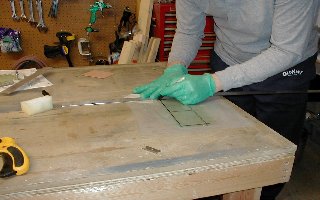
Next use the razor blade to separate the top layer of drop cloth from one of your cut out strips. Strip the top layer of drop cloth away and pick up your resin saturated glass strip and apply it to your work. The really nice thing about this process is the lower layer of plastic is keeping your cloth from stretching while you apply it to your work. This is not so important for little pieces like I show here but you can imagine what it's like when your doing the windscreen fairing and the strips are 40 inches long.
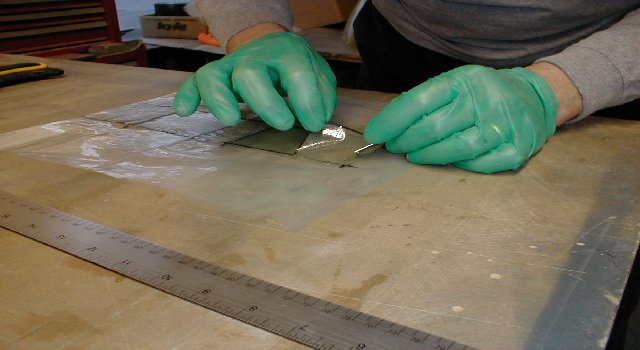
Once the cloth is in place use your razor blade to remove the remaining layer of plastic from the fiberglass cloth.
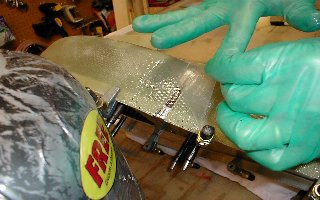
Use one of your fresh ( has no resin on it ) foam rubber squares to tamp down the fiberglass you just laid on your work to make sure that it's well attached to the surface of your work.
Now cut a few strips of the peal-ply that are large enough to cover the glass you just applied to your work and place them on top of your glass using the foam rubber to tamp them down.
The extra resin from the cloth will be absorbed into the peal-ply and will hold it in place for later removal.
Finish applying all remaining glass to your work.
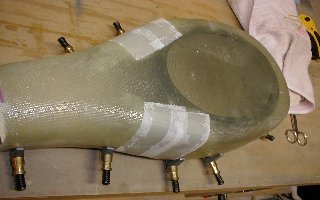
Wait 24 hours.
Now pull the peal-ply from your finished work. TA-DA!
You now have a surface that has the minimum amount of resin ( weight ) and can be filled for finish with Superfil or resin and glass bubbles.
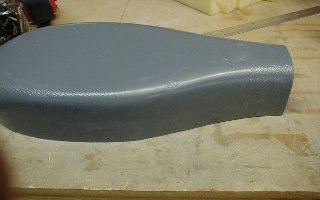
Well, actually, I did not have any photos of the finished glass work but this is what it looked like after filling the under side gap with resin and cotton fibers, laying another layer of glass on the inside and priming. I did mention that fiberglassing was a lot of work, oh yes :-)
And finally the finished product with Van's heat muff attachment installed...
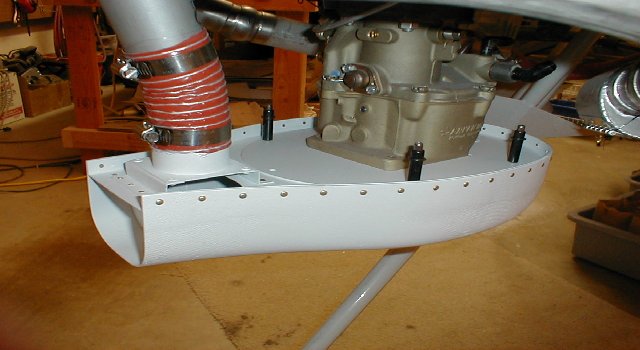
The paint is High Heat Rust-oleum purchased from Home
Depot. Good to 1200 degrees F. White of course. I plan
on painting everything I can in the engine compartment white. This
makes problems easy to spot in a hurry.